A practical teaching guide
Take attendance at an online music class in four simple steps.
Prepare a session-specific link before teaching, share it at the start of the lesson, and review the recorded check-ins afterward. Participants use their browser.
- In-person and browser check-in
- Attendance organized by event
- Returning people, one visitor list
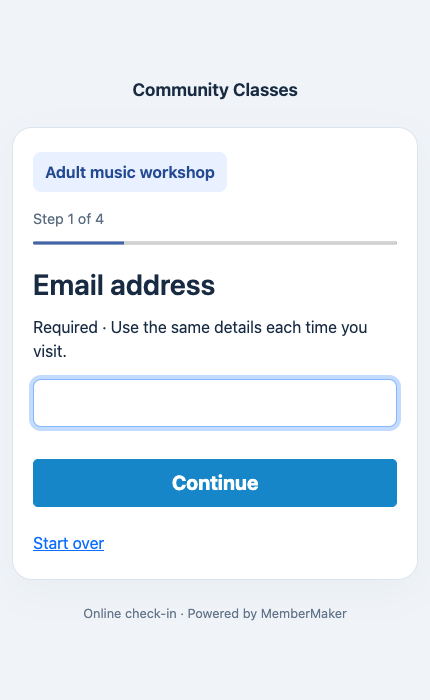
Before, during, and after the lesson
A short routine you can repeat
- Before teaching: create the sessionCreate an event such as Online music workshop and a check-in link associated with it. Open the link yourself to verify the event and contact fields.
- At the start: share the linkPaste the link into your meeting chat or send it using your usual email tool. Ask participants to check in once using their own identifying email or phone.
- During the lesson: welcome late arrivalsRepeat the instruction for anyone joining late. The browser flow records check-ins; it does not monitor the meeting or verify how long someone participates.
- Afterward: review the eventFilter the dashboard Check-Ins tab to the event. Export the records if needed. For the next separately tracked lesson, create its own event and link.
One event, one attendance record
From the first arrival to the last check-in
Create a separate event for each session you want to review independently.
Step 1
Create your event
Give the session a recognizable name. Add an optional date, time, and description. Dates are informational: they do not automatically activate or expire a session.
Step 2
Choose how people check in
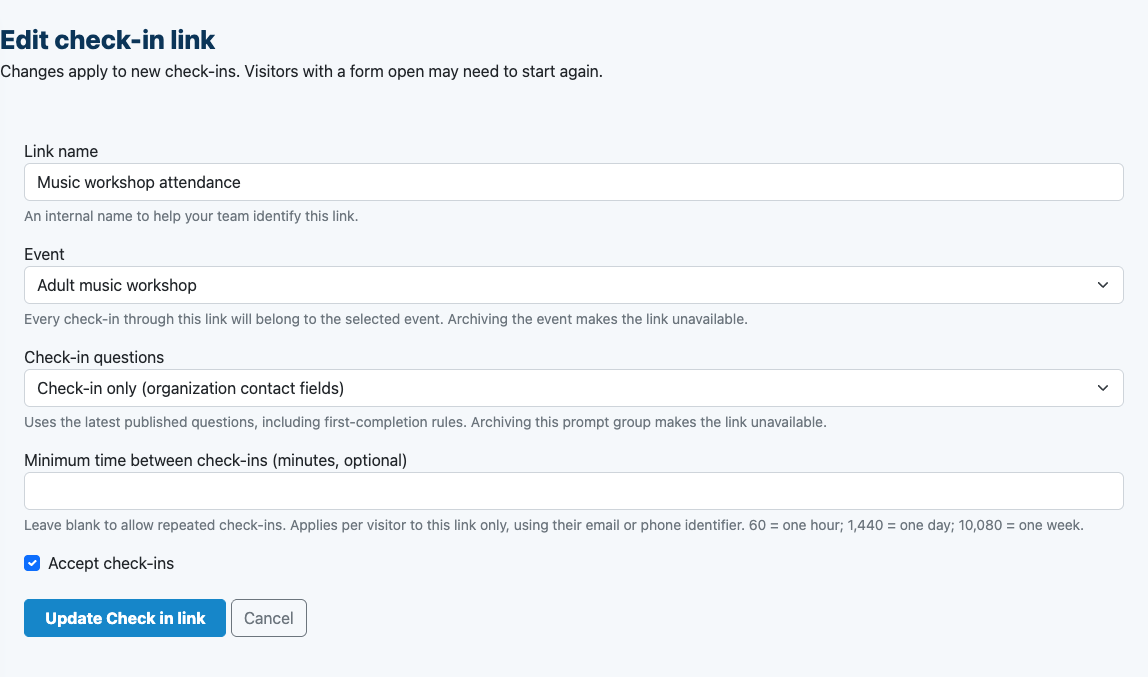
For in-person attendance, select the active event on each app device. For online attendance, choose the event when creating a web check-in link and share that link with participants.
Step 3
Review who attended
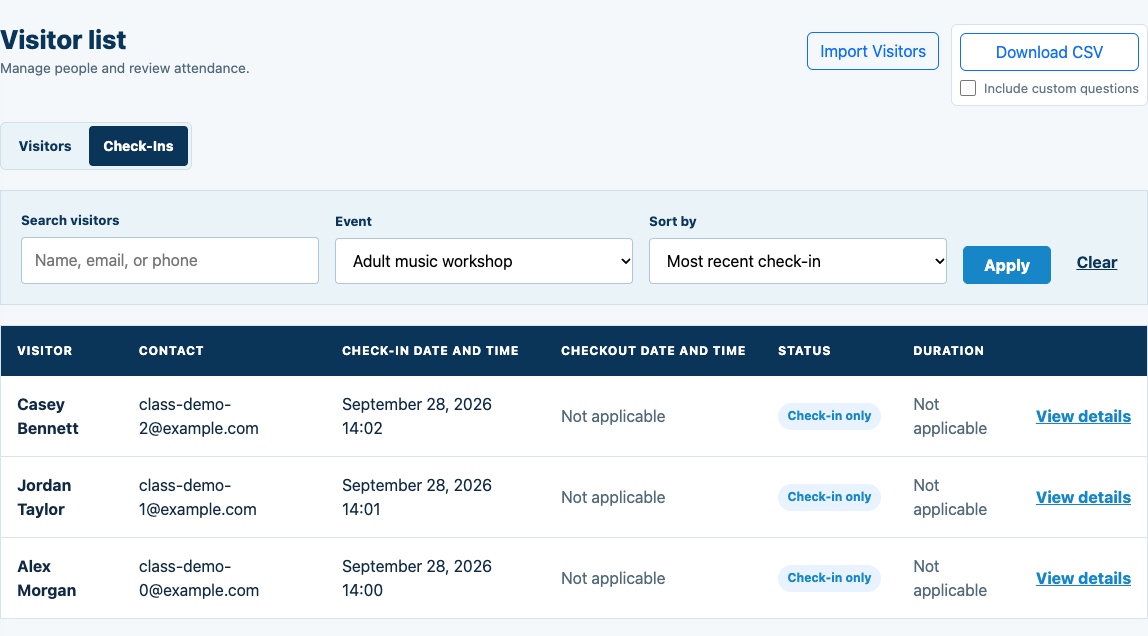
Use the dashboard’s Check-Ins tab and event filter to review the session’s recorded attendance. Export CSV when you need to work with it in a spreadsheet.
Event-specific setup requires Events to be enabled for your organization. Sharing web check-in links also requires online check-in to be enabled. Creating an account does not automatically enable these features.
Explore simple class attendance →The actual workflow
Choose the event. See its attendance.
Examples below use fictional participants in a local demonstration organization.
A familiar welcome for new and returning people
Bring your visitor list
Import names and emails from CSV, with optional phone numbers. Importing does not create visits or send emails.
Ask what you need
Use optional custom questions to collect relevant session information. Returning participants follow the flow’s existing completion rules.
Take your attendance with you
Export dashboard records to CSV. Include custom questions when you need the answers recorded on each check-in.
Designed here for adult and general classes. Each participant needs their own identifying email or phone. Use your existing tools for enrollment, scheduling, payments, and any participation or progression assessments.
How to Track Attendance for Online Music Classes: questions
When should I share the check-in link?
Share it in the meeting chat at the beginning and repeat the instruction for late arrivals. Explain that it records attendance; completing it does not verify participation for the full lesson.
Do returning participants have to start over?
The check-in flow looks up the participant using the configured email or phone identifier. Returning participants follow the information and question requirements for that flow. Each person needs their own identifying email or phone; shared family profiles are not part of this workflow.
Can I bring an existing participant list?
Yes. Import Visitors in the web dashboard accepts a CSV with required names and emails and optional phone numbers. Existing emails are skipped. Importing adds people without creating attendance or sending invitations.
Does an event date automatically open a class?
No. Create and select each session yourself. The app’s active event is selected independently on each device, and a web check-in link uses the event associated with that link.
Can I include custom questions in an attendance export?
Yes. Enable Include custom questions when downloading the dashboard CSV. Check-in rows contain answers recorded on that visit; missing answers remain blank.
Make the next check-in simple.
Start with your web account, then prepare your attendance workflow.